
How to create a Xamarin / TypeScript project for SmartPhone Project with Visual Studio 2017
Principles and Goals of Universal Windows Plateforms (UWP), Xamarin and TypeScript
:
From Framework 3.5 to version 4, we were able to create Windows Presentation Framework (WPF) -based applications primarily for heavy office-type client solutions.
But later from the Visual Studio 2015 development environments and Xamarin Studio, new types of applications have been realized among others UWP (Universal Windows Platforms) applications, this type
of application support many more platforms and can be extended to other thin client-oriented languages like JavaScript.
It is now possible from the C # / XAML and JavaScript languages to create mutliplatform applications called UWP.
To fully understand the mechanism, with these 2 types of technologies (XAML and JavaScript) can create applications
on SmartPhones and touch tablets: Windows Phone 10, Android, IoS and even Linux.
And those for phone and tablet supporting the Android system as brands Samsung, Apple and more than a hundred manufacturers running on Android versions 2.1 to 8.0.0 with different distributions like
Android Marshmallow or Nougat.
Similarly with these new types of applications have the possibility with UWP to create Internet Of Things (IoT) projects on
micro motherboards in embedded as Raspberry PI or Qualcomm DragonBoard.
Regarding the different types of Xamarin and TypeScript applications: there are 2 categories :
Native Applications: write in manufacturer language and recognized directly by the terminal system :
Example: App written in Objective-C for Apple IoS
App written in Java for Android systems.
App written in C # for Microsoft systems.
Then the non-native applications written in Web supported on all the platforms :
App written in JavaScript compatible on Microsoft, Apple and Android systems.
This accounting is provided by the web browser of the mobile terminal browser.
This is the case thanks to the interpreter of the Apache web browser with among other applications written from
Apache Cordova technology that allows since JavaScript to create multiplatform apps regardless of the builders: it is the interoperability of the platforms.
More than 10 years ago this goal of interoperability of the platforms was the goal of the Java language now it is ensured since
the JavaScript thin client language.
If this cross-platform compatibility is provided with JavaScript for
non-native applications.
So we could say what's the point of continuing to develop with
native language or even heavy client-oriented code
as Objective-C or C # / XAML?
This multi-platform accounting is assured among other
things with C # / XAML or any other heavy client language
thanks to the Xamarin
platform.
To fully understand what Xamarin is, initially it was
the Mono Project to make applications compatible
Windows and Linux together. Then Mono became the
Moonlight project initiated by the Microsoft community.
Moonlight has given birth to the Xamarin project,
which has made it possible since any language to write multiplatform applications.
Since C # / XAML, we can native applications for Windows Mobile,
Android and IoS Apple.
Similarly since Mac OS, we can create multiplatform applications.
TypeScript is used to create Non-Native applications based on
JavaScript.
Xamarin is used tp create Native applications based on heavy client-orented code.

The Same Job with Xamarin.Net and Apache Cordova : only difference Native and No-Native plateform but Cross-Plateform.
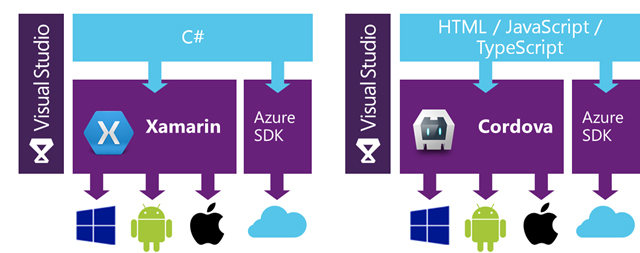
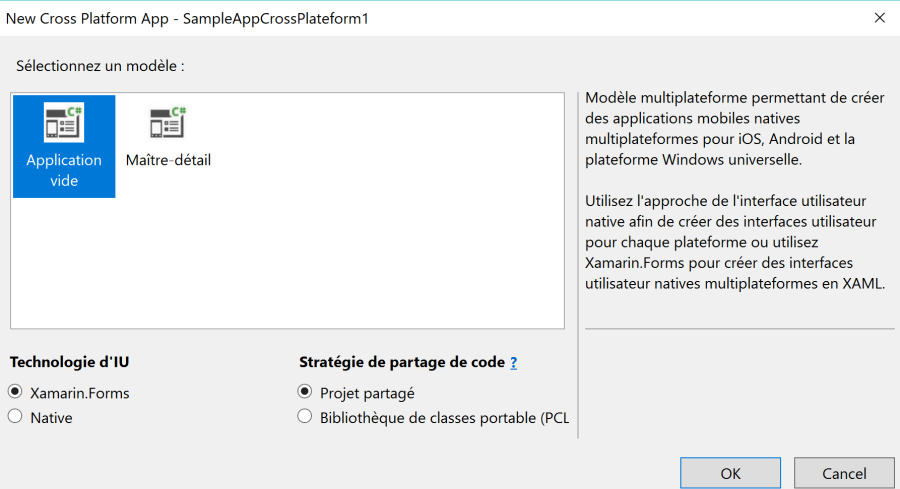
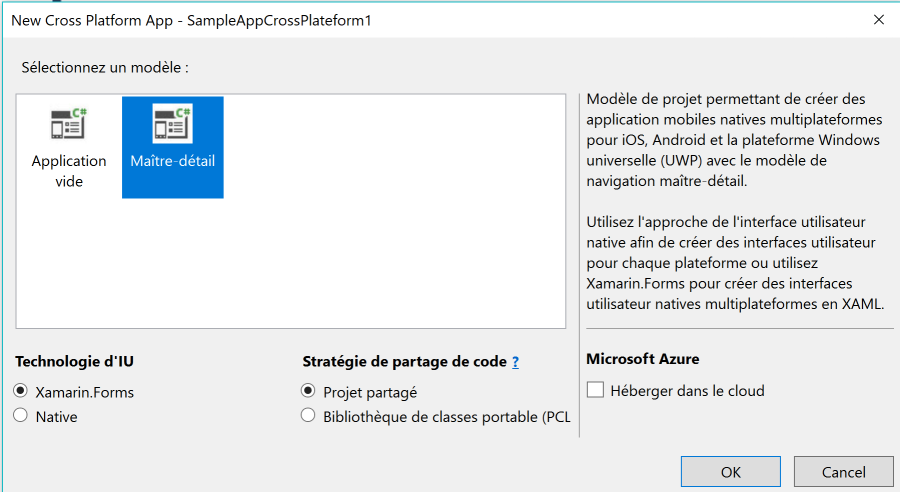
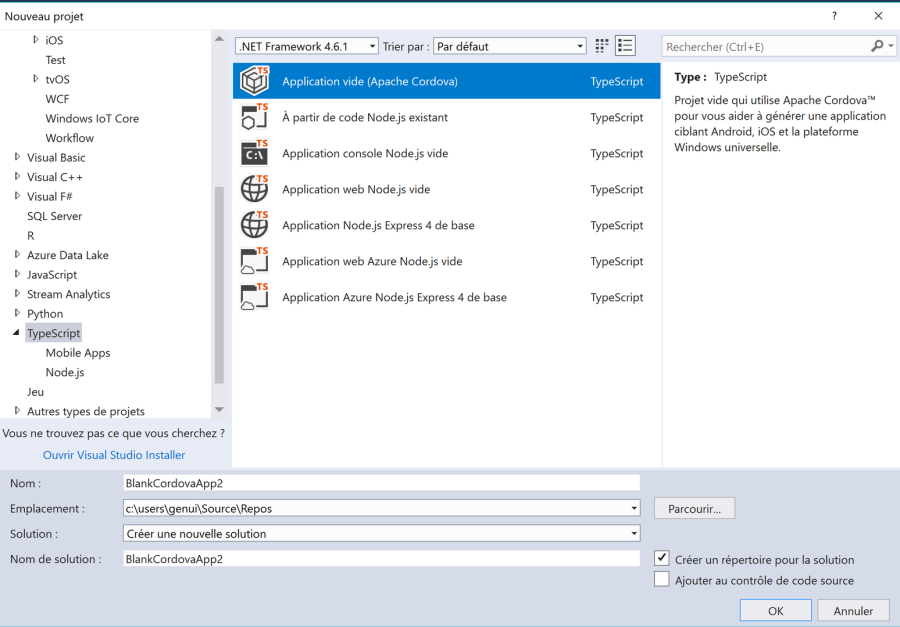
Sample of creation of Cross-plateform project with Xamarin (C#/XAML)

Choose a Empty Application or Application based on Master-Details
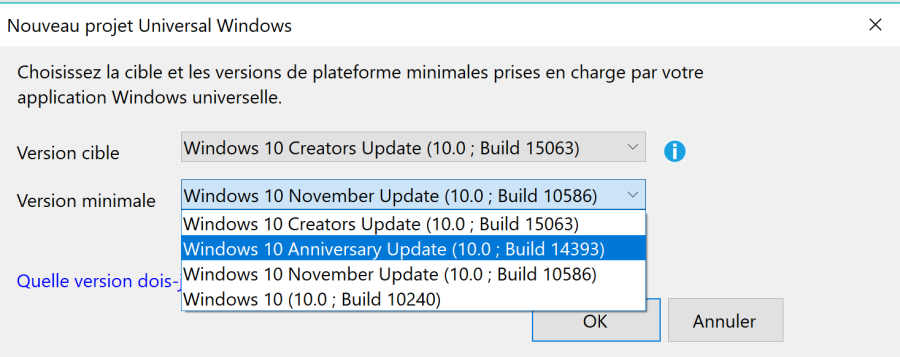
Choose an UWP target Plateform for your solution : a Windows 10 specific build version
Which version of target platform to choose? it depends on the version of your operating system and therefore different updates.
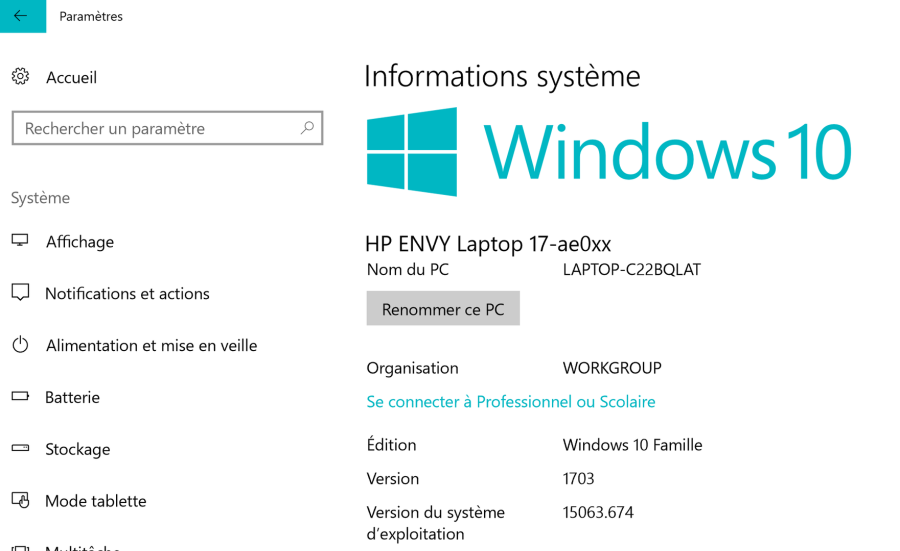
You will find this information in the system settings of your PC, however it is recommended to update your computer regularly to have the most stable version possible including the latest patches and
improvements.
In Your System settings configuration page : you can see here the last version updated of Windows 10 : version 15063.
After choosing the latest updated version of Platform Update Creator
15063, your solution is created from
UWP cross-platform project model, Android and IoS.
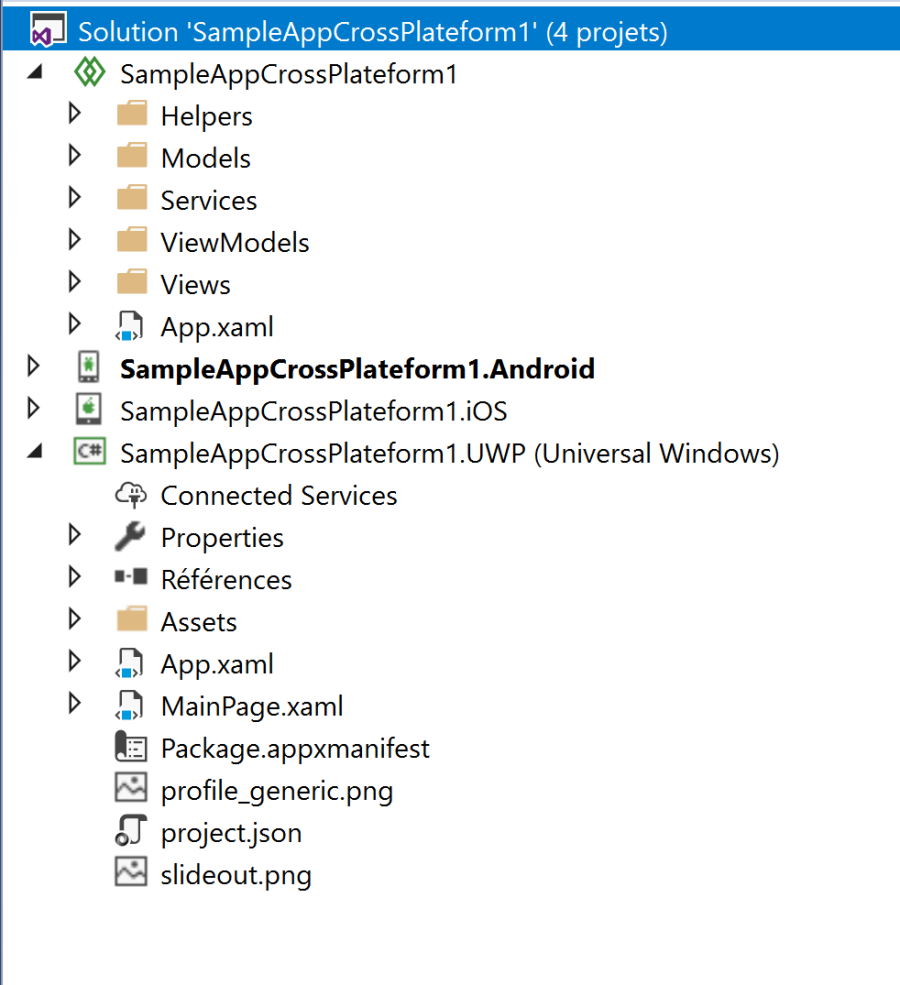
You can see on the Top of the solution, a Shared
project that contains the shared source code between all
the differents plateforms.
Sample of creation of Cross-plateform project with Apache Cordova (TypeScript)
A sample of Android project write with C#/XAML used Xamarin plateform :
in this complete sample, you can see the creation of Google App with Xamarin tools.
The main assembly use to develop with Xamarin is Mono.Android.
For a Cross-Plateform project is Xamarin.Forms, for understand in the past Xamarin was Mono project
but it's the same behaviour to develop.
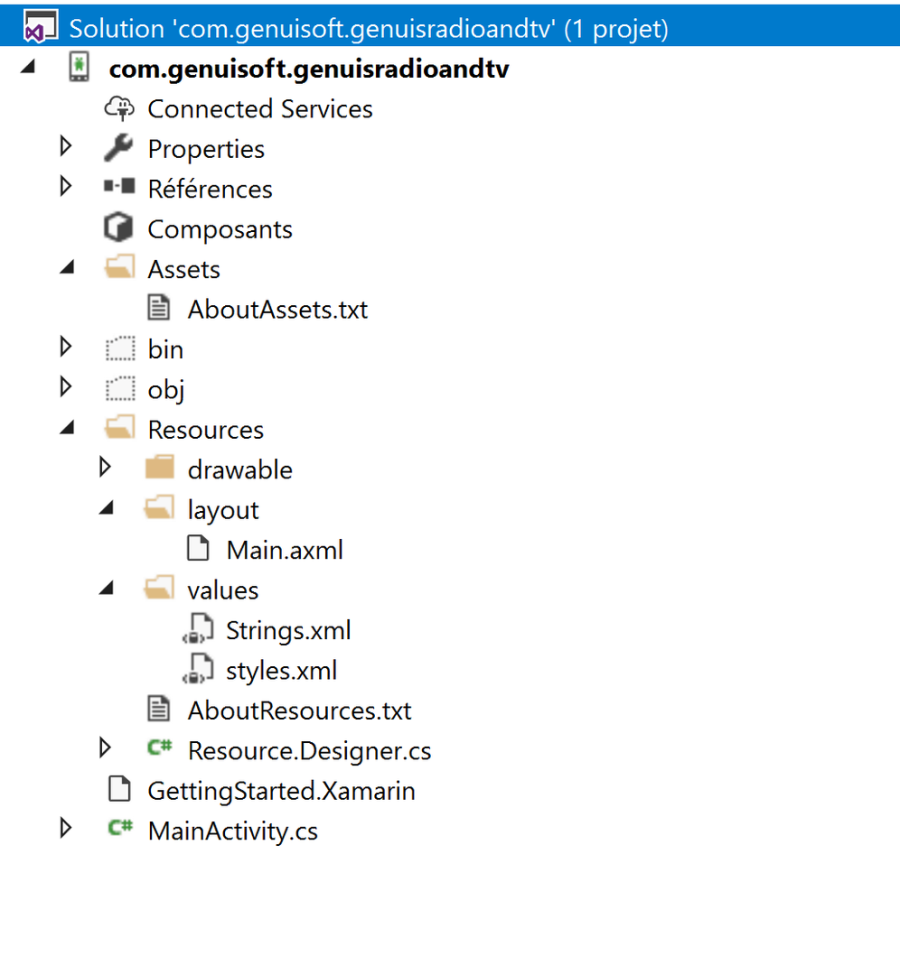
In an Android project, you have the main entry point or main class of the MainActivity project in C # is the MainActivity.cs file.
This class derives from the MainActivity base class and must override the OnCreate (Bundle) method.
It features MainActivity attribute tags with different Label, MainLauncher, and Icon options.
Always think of calling the SetContentView method which allows to attach to our class the display page defined in the
Project resources, here accessible from Resource.Layout namely the Hand written graphic resource in XAML.
[Activity (Label = "com.genuisoft.genuisradioandtv", MainLauncher = true, Icon = "@ drawable / icon")]
public class MainActivity: Activity
{
protected override void OnCreate (bundle bundle)
{
base.OnCreate (bundle);
// Set our view from the "main" layout resource
SetContentView (Resource.Layout.Main);
}
}
They are broken down into 3 subdirectories found in Resources: drawable, layout and values.
Drawable: will contain the graphic resources types images: png, jpg or ico as well as XML graphic resource files
to customize components of the HMI.
This is a sample of XML customization of graphical component, here a button template :
<?xml version="1.0" encoding="utf-8"?>
<selector xmlns:android="http://schemas.android.com/apk/res/android">
<item android:state_pressed="true" >
<shape>
<solid
android:color="#85530F" />
<stroke
android:width="1dp"
android:color="#85530F" />
<corners
android:radius="6dp" />
<padding
android:left="3dp"
android:top="3dp"
android:right="3dp"
android:bottom="3dp" />
</shape>
</item>
<item>
<shape>
<gradient
android:startColor="#85530F"
android:endColor="#85530F"
android:angle="270" />
<stroke
android:width="1dp"
android:color="#5A3A22" />
<corners
android:radius="25dp" />
<padding
android:left="2dp"
android:top="2dp"
android:right="2dp"
android:bottom="2dp" />
</shape>
</item>
</selector>
Contains on the Strings.xml
<?xml version="1.0" encoding="utf-8"?>
<resources>
<string name="Hello">Hello World, Click Me!</string>
<string name="ApplicationName">Genuis News Speech</string>
</resources>
For the axml extension instead of xaml, the Xaml language is well used in this graphic file
but this axml extension is recognized by Android systems.
This file is content on the Layout folder of your project.
It's required to use the namespace http://schemas.android.com/apk/res/android.
This namespace defined the XML langage structure of your graphical file.
<?xml version="1.0" encoding="utf-8"?>
<LinearLayout xmlns:android="http://schemas.android.com/apk/res/android"
xmlns:tools="http://schemas.android.com/tools"
android:orientation="vertical"
android:theme="@android:style/Theme.Black.NoTitleBar"
android:background="@drawable/wallpaper"
android:layout_width="match_parent"
android:id="@+id/stackView1"
android:layout_height="match_parent">
<ImageView
android:id="@+id/img"
android:src="@drawable/speech"
android:layout_gravity="center_vertical|center_horizontal"
android:layout_width="50dp"
android:layout_height="50dp" />
<EditText
android:id="@+id/txtitle"
android:editable="false"
android:layout_width="match_parent"
android:layout_height="50dp"
android:textSize="14dp"
android:foreground="@android:color/holo_purple"
android:textColor="@android:color/holo_purple"
android:textStyle="bold"
android:layout_marginStart="5dp"
android:layout_marginEnd="5dp"
android:layout_marginTop="5dp"
android:layout_marginBottom="5dp"
android:backgroundTint="#fff0ffff"
android:background="@android:color/holo_green_light" />
<Spinner
android:id="@+id/comboboxlang"
android:layout_width="match_parent"
android:prompt="@string/planet_prompt"
android:background="@android:color/black"
android:foreground="@android:color/white"
android:layout_height="50dp" />
<WebView
android:id="@+id/imagecenter"
android:layout_width="match_parent"
android:layout_height="220dp"
android:layout_marginTop="5dp"
android:paddingStart="5dp"
android:paddingEnd="5dp"
android:paddingTop="5dp"
android:background="@android:color/holo_green_light"
android:foreground="@android:color/holo_purple"
android:textColor="@android:color/holo_purple"
android:paddingBottom="5dp"
android:paddingRight="4dp"
android:paddingLeft="5dp" />
<Button
android:id="@+id/buttonlisten"
android:textSize="18dp"
android:textStyle="bold"
android:background="@drawable/micro"
android:onClick="buttonlistenclick"
android:layout_gravity="center_vertical|center_horizontal"
android:layout_height="70dp"
android:layout_width="70dp" />
<Button
android:id="@+id/buttonstop"
android:textSize="14dp"
android:textStyle="bold"
android:text="Stop"
android:background="@drawable/bluebutton"
android:onClick="buttonstopclick"
android:layout_gravity="center_vertical|center_horizontal"
android:layout_height="70dp"
android:layout_width="70dp" />
</LinearLayout>
The most important property for any component
are
android:id with an index increment for the component
identifier and many other
parameters like textSize, textStyle,text,
background.
You need to respect the naming specific to Java
langage : all keyword are called
on the android namespace and the property name begin
on lowercase and highercase
between the word.
Java language and XAML coexists in our
development.
In this sample source code, you'll see how to
handle interactions between Android graphics
and C # source code.
On a Button component, you have the android
method: onclick, you assign it the
textlistlistenclick property.
<Button
android: id = "@ + id / buttonplay"
android: textSize = "14dp"
android: TextStyle = "bold"
android: background = "@ drawable / play"
android: onclick = "buttonlistenclick"
android: foreground = "@ android: color / white"
android: layout_gravity = "center_vertical | center_horizontal"
android: layout_height = "80dp"
android: layout_width = "80dp"
android: layout_marginTop = "5DP"
android: layout_marginBottom = "5DP"
android: paddingStart = "5DP"
android: paddingEnd = "5DP"
android: paddingTop = "5DP"
android: textColor = "@ android: color / background_light"
android: layout_marginRight = "5DP"
android: layout_marginStart = "5DP"
android: layout_marginEnd = "5DP"
android: layout_marginLeft = "5dp" />
In the MainActivity.cs file, you need to attach
the declare event buttonlistenclick
on a delegate method like this
:
[Export("buttonstopclick")]
public void buttonStopClick(View v)
{
if
(mediaPlayer == null)
return;
if
(mediaPlayer.IsPlaying)
mediaPlayer.Stop();
}
The most important in this sample is the Tag
attribute Export, it's permit to bind
the action method buttonStopClick(View v) to the
Android componant Button.
To call an instance of a graphical component, you
need to use the method FindViewById<T>(resourceId)
with a generic type.
SeekBar _seekBar =
FindViewById<SeekBar>(Resource.Id.seekBar1);
or
Button _buttonPlay = FindViewById<Button>(Resource.Id.buttonPlay);
Of more you are the possibility to implemented
many graphical behaviour
with :MediaPlayer.IOnPreparedListener,
ISurfaceHolderCallback, SeekBar.IOnSeekBarChangeListener.
MediaPlayer.IOnPreparedListener : use for a MediaPlayer component interactions with the method OnPrepared(MediaPlayer player).
ISurfaceHolderCallback : use to
manage the tactile interactions.
Definition of the Interface to interact with
the tactile screen :
[Register("android/view/SurfaceHolder$Callback", "", "Android.Views.ISurfaceHolderCallbackInvoker", ApiSince = 1)]
public interface ISurfaceHolderCallback :
IJavaObject, IDisposable
{
[Register("surfaceChanged", "(Landroid/view/SurfaceHolder;III)V", "GetSurfaceChanged_Landroid_view_SurfaceHolder_IIIHandler:Android.Views.ISurfaceHolderCallbackInvoker, Mono.Android, Version=0.0.0.0,
Culture=neutral, PublicKeyToken=null")]
void SurfaceChanged(ISurfaceHolder
holder, [GeneratedEnum] Format format, int width, int height);
[Register("surfaceCreated", "(Landroid/view/SurfaceHolder;)V", "GetSurfaceCreated_Landroid_view_SurfaceHolder_Handler:Android.Views.ISurfaceHolderCallbackInvoker, Mono.Android, Version=0.0.0.0,
Culture=neutral, PublicKeyToken=null")]
void SurfaceCreated(ISurfaceHolder
holder);
[Register("surfaceDestroyed", "(Landroid/view/SurfaceHolder;)V", "GetSurfaceDestroyed_Landroid_view_SurfaceHolder_Handler:Android.Views.ISurfaceHolderCallbackInvoker, Mono.Android, Version=0.0.0.0,
Culture=neutral, PublicKeyToken=null")]
void
SurfaceDestroyed(ISurfaceHolder holder);
}
SeekBar.IOnSeekBarChangeListener
: to manage the interactions between the user and a seekbar component.
public interface
IOnSeekBarChangeListener : IJavaObject, IDisposable
{
[Register("onProgressChanged", "(Landroid/widget/SeekBar;IZ)V", "GetOnProgressChanged_Landroid_widget_SeekBar_IZHandler:Android.Widget.SeekBar/IOnSeekBarChangeListenerInvoker, Mono.Android,
Version=0.0.0.0, Culture=neutral, PublicKeyToken=null")]
void
OnProgressChanged(SeekBar seekBar, int progress, bool fromUser);
[Register("onStartTrackingTouch", "(Landroid/widget/SeekBar;)V", "GetOnStartTrackingTouch_Landroid_widget_SeekBar_Handler:Android.Widget.SeekBar/IOnSeekBarChangeListenerInvoker, Mono.Android,
Version=0.0.0.0, Culture=neutral, PublicKeyToken=null")]
void
OnStartTrackingTouch(SeekBar seekBar);
[Register("onStopTrackingTouch", "(Landroid/widget/SeekBar;)V", "GetOnStopTrackingTouch_Landroid_widget_SeekBar_Handler:Android.Widget.SeekBar/IOnSeekBarChangeListenerInvoker, Mono.Android,
Version=0.0.0.0, Culture=neutral, PublicKeyToken=null")]
void
OnStopTrackingTouch(SeekBar seekBar);
}
Configuring and Deployment :
Regarding the mobile deployment platform, we will try
to deploy our solution
on a Samung Galaxy S7 running with the Android 7.0 Nougat operating system.
You must have a file in your solution
called package.config which
the structure and the content should look like
this:
<? xml version = "1.0" encoding =
"utf-8"?>
<Package>
<package id =
"Xamarin.Android.Support.Annotations" version = "25.4.0.2" targetFramework = "monoandroid70" />
<package id =
"Xamarin.Android.Support.Compat" version = "25.4.0.2" targetFramework = "monoandroid70" />
<package id =
"Xamarin.Android.Support.Core.UI" version = "25.4.0.2" targetFramework = "monoandroid70" />
<package id =
"Xamarin.Android.Support.Core.Utils" version = "25.4.0.2" targetFramework = "monoandroid70" />
<package id =
"Xamarin.Android.Support.Fragment" version = "25.4.0.2" targetFramework = "monoandroid70" />
<package id =
"Xamarin.Android.Support.Media.Compat" version = "25.4.0.2" targetFramework = "monoandroid70" />
<package id = "Xamarin.Android.Support.v4"
version = "25.4.0.2" targetFramework = "monoandroid70" />
<package id = "Xamarin.Build.Download"
version = "0.4.7" targetFramework = "monoandroid70" />
<package id =
"Xamarin.Google.iOS.MobileAds" version = "7.19.0" targetFramework = "monoandroid70" />
<package id =
"Xamarin.GooglePlayServices.Ads" version = "42.1021.1" targetFramework = "monoandroid70" />
<package id =
"Xamarin.GooglePlayServices.Ads.Lite" version = "42.1021.1" targetFramework = "monoandroid70" />
<package id =
"Xamarin.GooglePlayServices.Base" version = "42.1021.1" targetFramework = "monoandroid70" />
<package id =
"Xamarin.GooglePlayServices.Basement" version = "42.1021.1" targetFramework = "monoandroid70" />
<package id =
"Xamarin.GooglePlayServices.Clearcut" version = "42.1021.1" targetFramework = "monoandroid70" />
<package id =
"Xamarin.GooglePlayServices.Gass" version = "42.1021.1" targetFramework = "monoandroid70" />
<package id =
"Xamarin.GooglePlayServices.Tasks" version = "42.1021.1" targetFramework = "monoandroid70" />
</ Packages>
Use the Android SDK Manager to install all required packages for your deployment :
For exemple, for a deployment in a Samsung Galaxy S7 with Android Nougat 7.0 need to use the API Level 24 but for a most recent version of Android Operating system, probably need to use the API Level 27 for Android 8.0.

And another important file of
configuration, AndroidManifest.xml like this :
this Xml file content the Android namespace, the
package name, the code version of deployement.
Of more the different rights need to use in your
application.
<?xml version="1.0"
encoding="utf-8"?>
<manifest
xmlns:android="http://schemas.android.com/apk/res/android" package="com.genuis.genuisradiotvwave" android:versionCode="3" android:versionName="1.0"
android:installLocation="preferExternal">
<uses-sdk android:minSdkVersion="14"
/>
<uses-permission
android:name="android.permission.INTERNET" />
<application android:allowBackup="true"
android:label="Genuis Radio TV" android:icon="@drawable/Icon"></application>
</manifest>
To test a deployment of your Project, 2 options :
- Use an an Physical external device like a SmartPhone with Android Operating System.
- Use a Virtual Device with an Android device emulator.
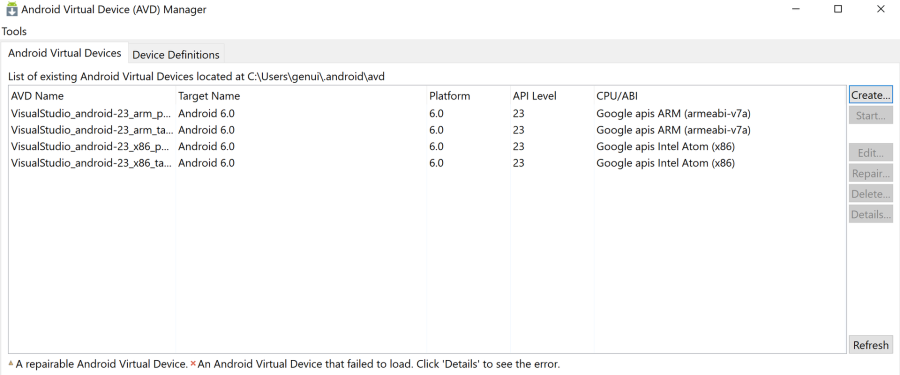
In the second option, you need to create and install an emulate device with
the Android Virtual Device monitor called AVD Manager.
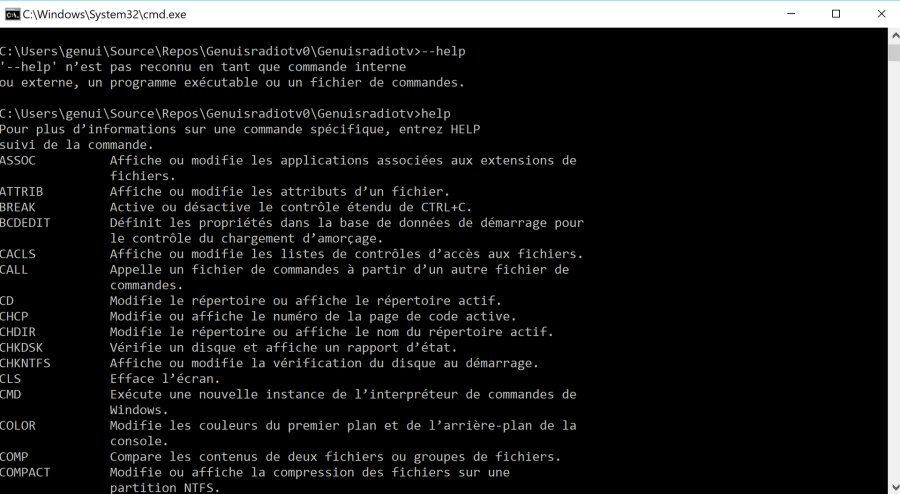
Another Tool very practice, the Adb Console, this command prompt permit to have a shell for configure the compilation and the deployment of your project.
For exemple, if your an error of deployment then you need to restart the Adb server.
Instruction to restart your Adb server :
adb kill-server
adb start-server
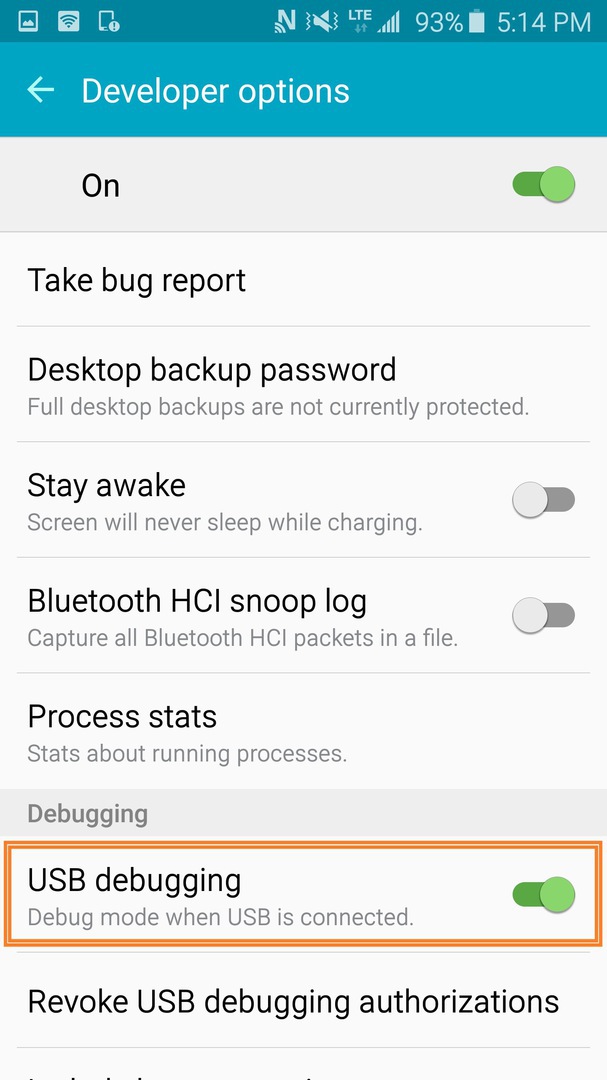
To Debug and deploy on your Android smartphone like Samsung Galaxy S7, you need to activate the USB debugging option mode on your phone settings.
Once your project is developed and the binaries generated by compilation, you need to create Deployment Packages, which are similar archives in Java to .jar archives.
Except for an Android project, these archives are packages signed Apk.
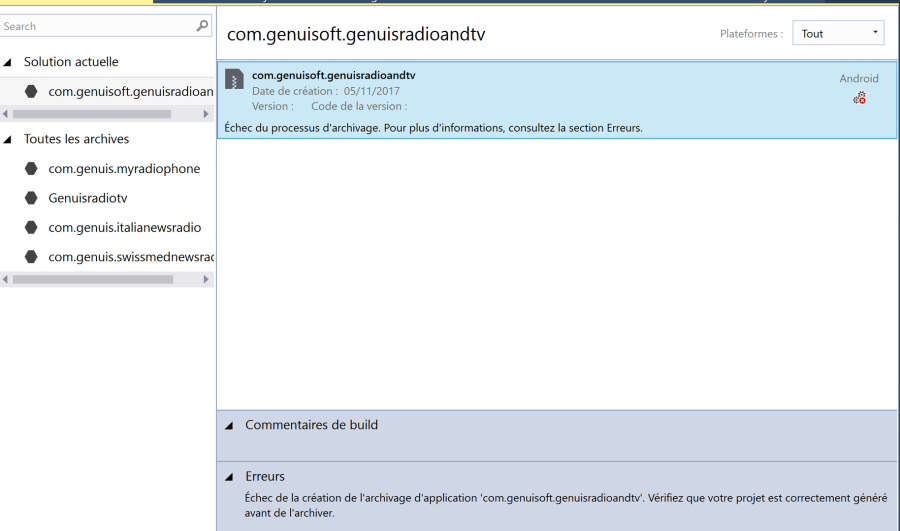
After your Apk signed package generated, you need to distribute your App with 2 ways :
Ad Hoc or Google Play.
In this step, you need to create Certificate file for your package with all editor informations and a password for encrypted your solution : it's mecanism to protect your source code creation.
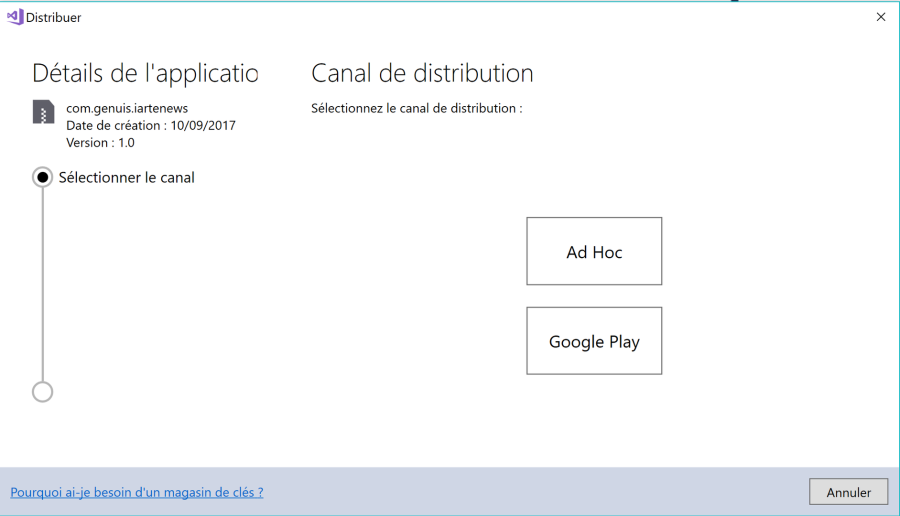
When your signed package are create and ready to
by distributed, you are the possibility to use a
Google Play account to publish your application on
the Google Store or another way of distribution.
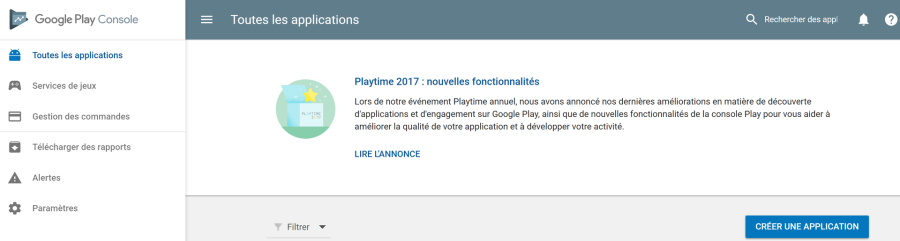
For the Google Play store, you need to create a valid
developer account with the Google Play Console
web page : but this step it's just a bonus remark for
Google developer.
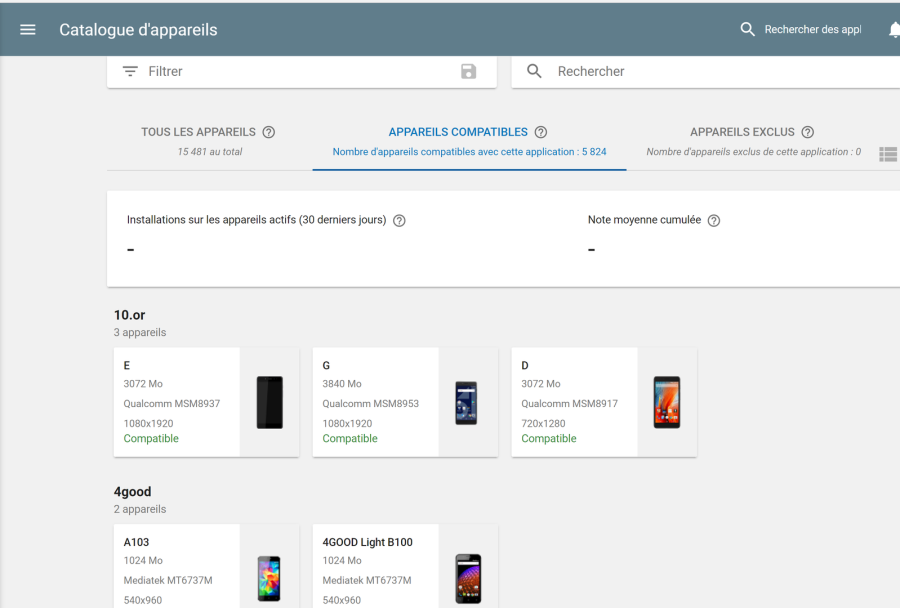
This page on Google Play Console is very interesting because it shows the number of devices listed compatible with our application, we can notice a large number of devices on the market where our Android application can run up to more than 15,481 devices !
About Xamarin project for Apple IoS for IPhone / Ipad device
Note about Xamarin projects oriented IoS, to create this type of project there is no emulator
IoS type IPhone or IPad compatible with the Microsoft architecture.
To realize this type of project and to be able to compile them, you will have to use a Mac OS application server
like for example a Macintosh paired with your PC, once the pairing done between your 2 computers,
Visual Studio will be able to use your Macintosh as an application server for debugging and then you can emulate an Iphone or Ipad deployment: but here again we have a specifity specific to the
differences of architecture between Windows and Macintosh.
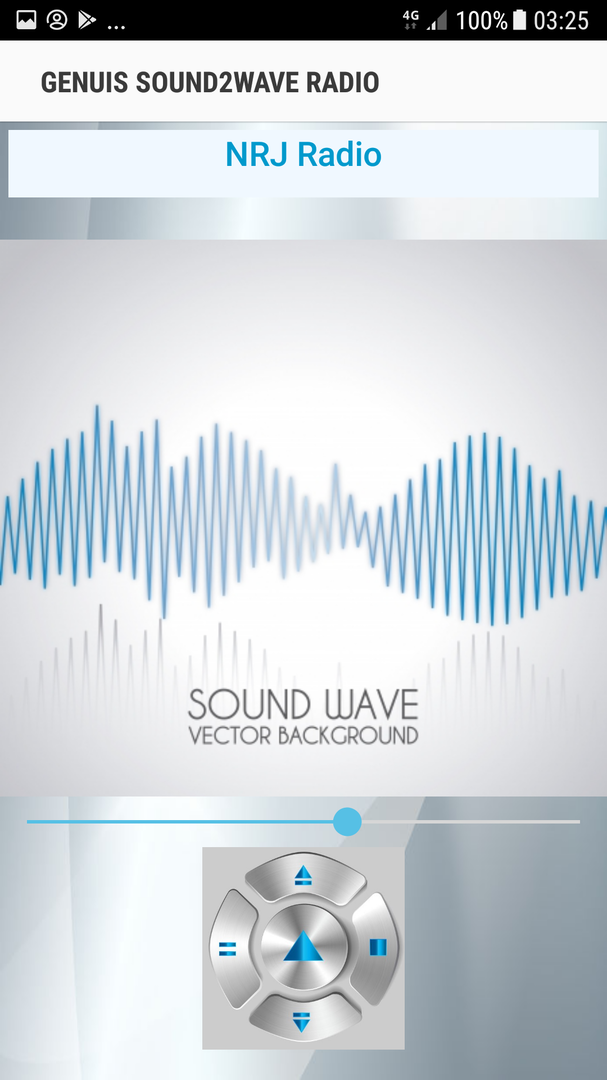
Sample Application deploy on a Samsung Galaxy 7 with Android Nougat 7.0
Visit
my Portfolio Website : www.genuisoft.com
Daniel Padrosa
Software Engineer senior
Microsoft Certified Professional
Microsoft Professional Associate
Microsoft Certified Technology Specialist
Microsoft Certified Professional Developer


Microsoft Certified Professional | PRO Development | Recognize Trademark © Genuisoft © Trademark 2014 - 2024